이번엔 MySQL 을 설치합니다.
https://dev.mysql.com/downloads/mysql/ 에 가서 Zip 파일로 배포되는 MySQL Community Server 를 다운받습니다.
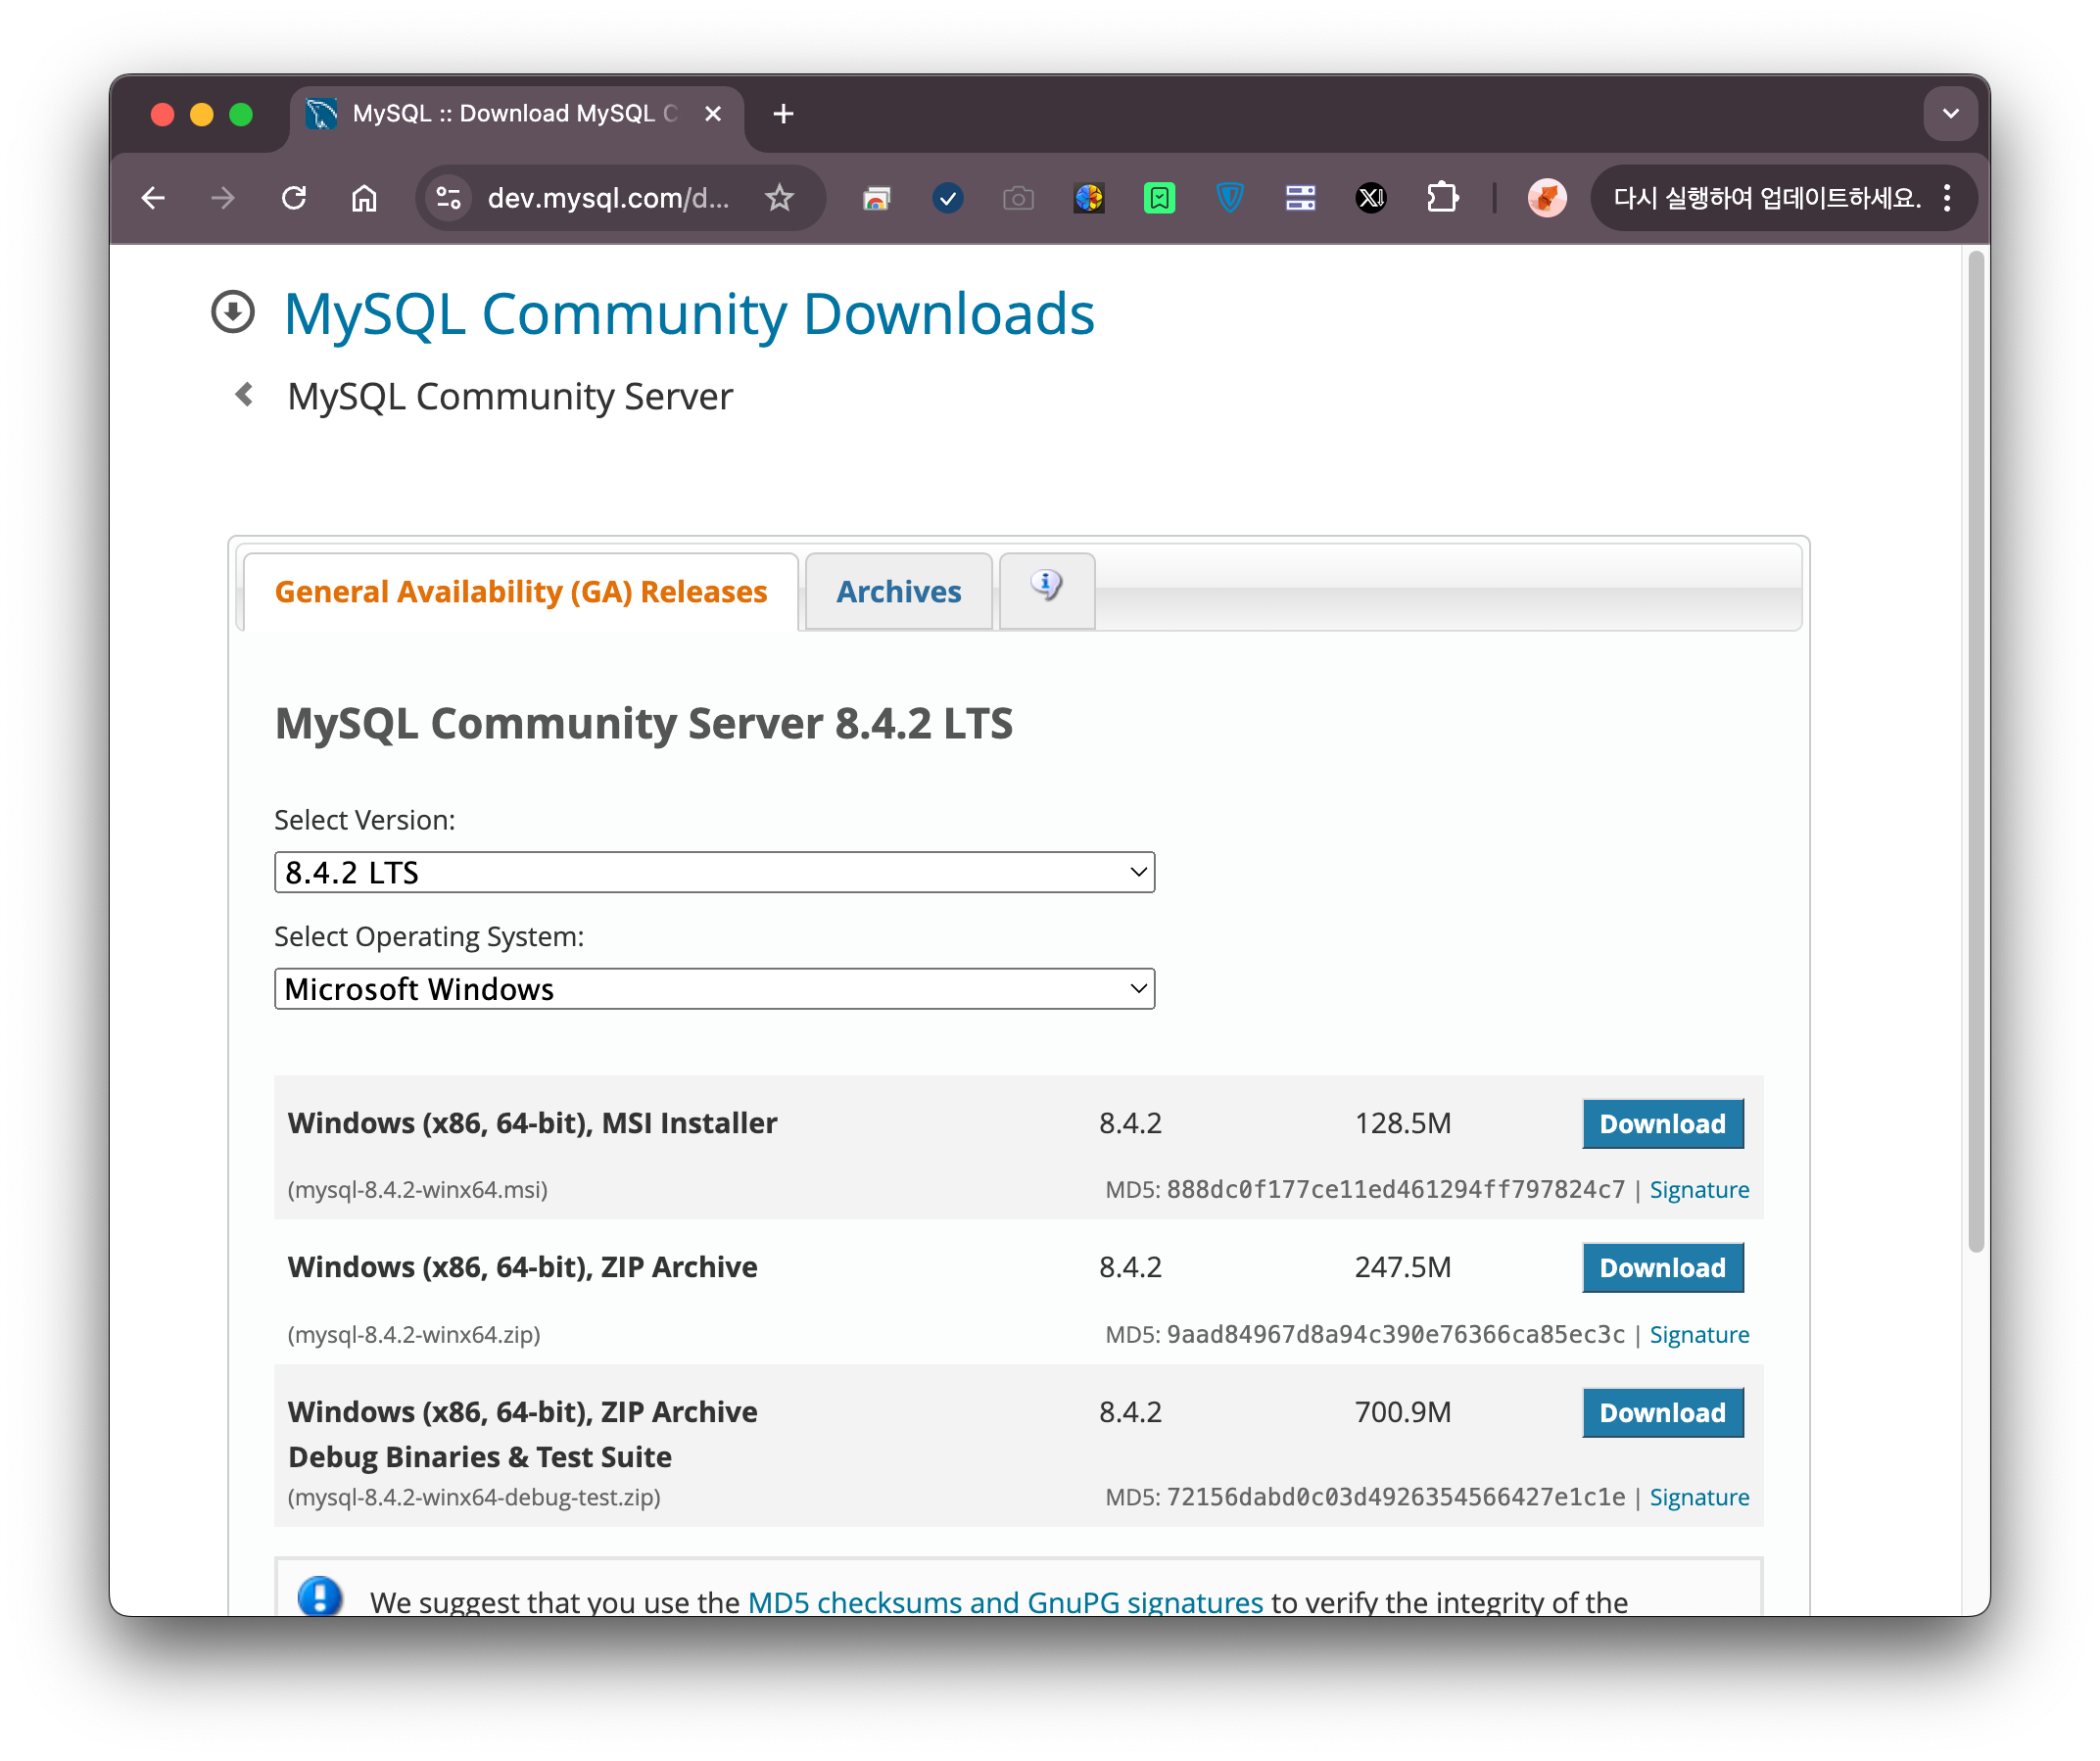
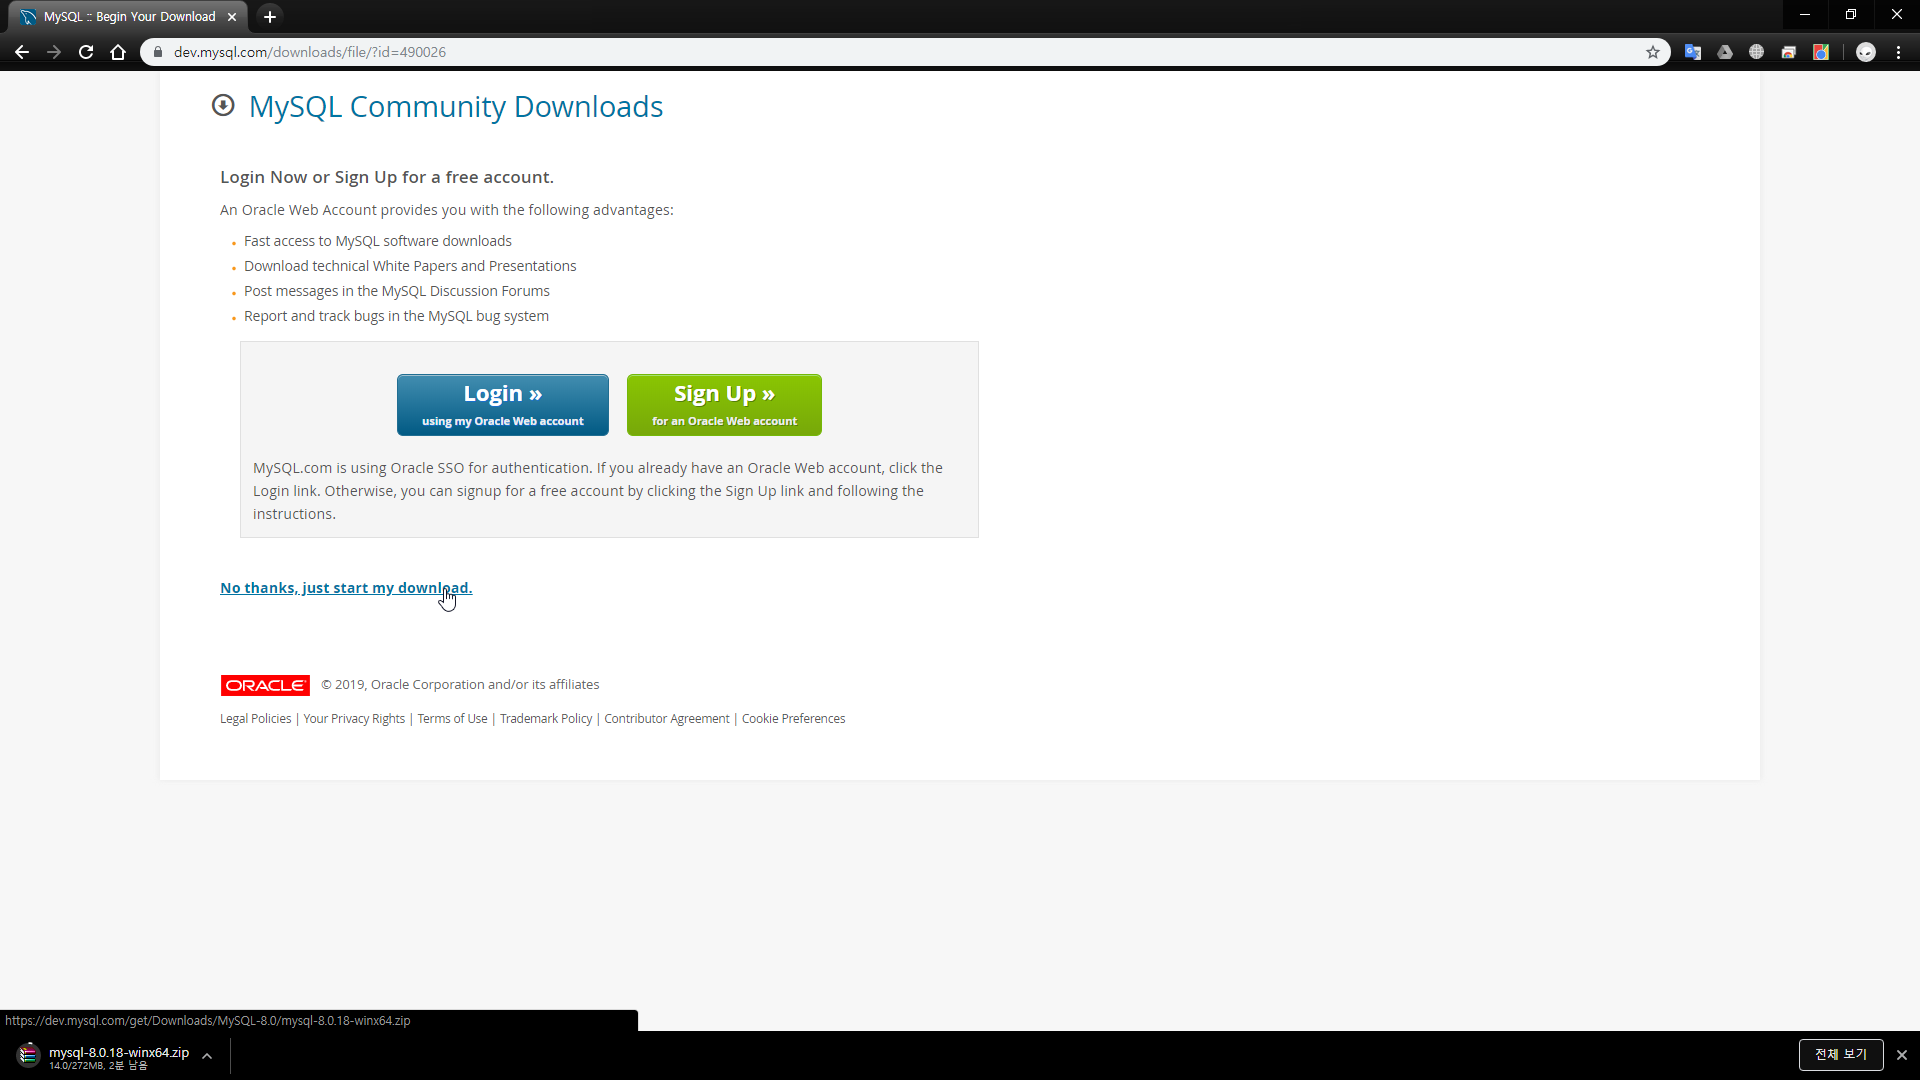
Debug Binaries & Test Suite 없는 Windows (x86, 64-bit), ZIP Archive 의 [Download] 를 클릭합니다. 진행된 페이지에서 로그인하라는 내용이 보이는데, 그냥 No Thanks… 클릭하면 다운로드 시작됩니다.
다운받은 zip 파일은 D:\\APM 아래로 옮기고 압축을 풀어줍니다. 아래 이미지는 예전 캡쳐 파일입니다. 버전은 변경되었습니다.
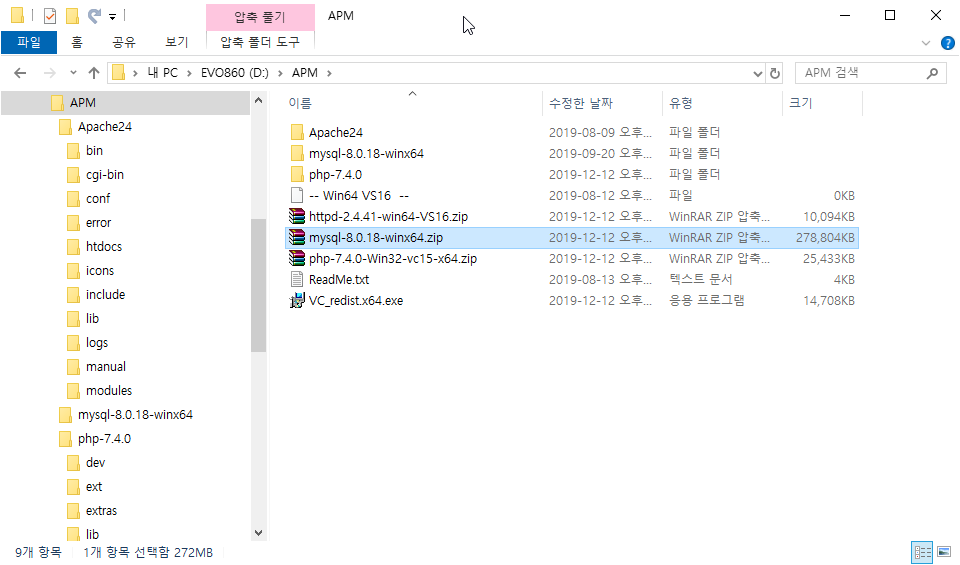
역시 이름이 기니까, mysql-8.0.18 로 수정합니다.
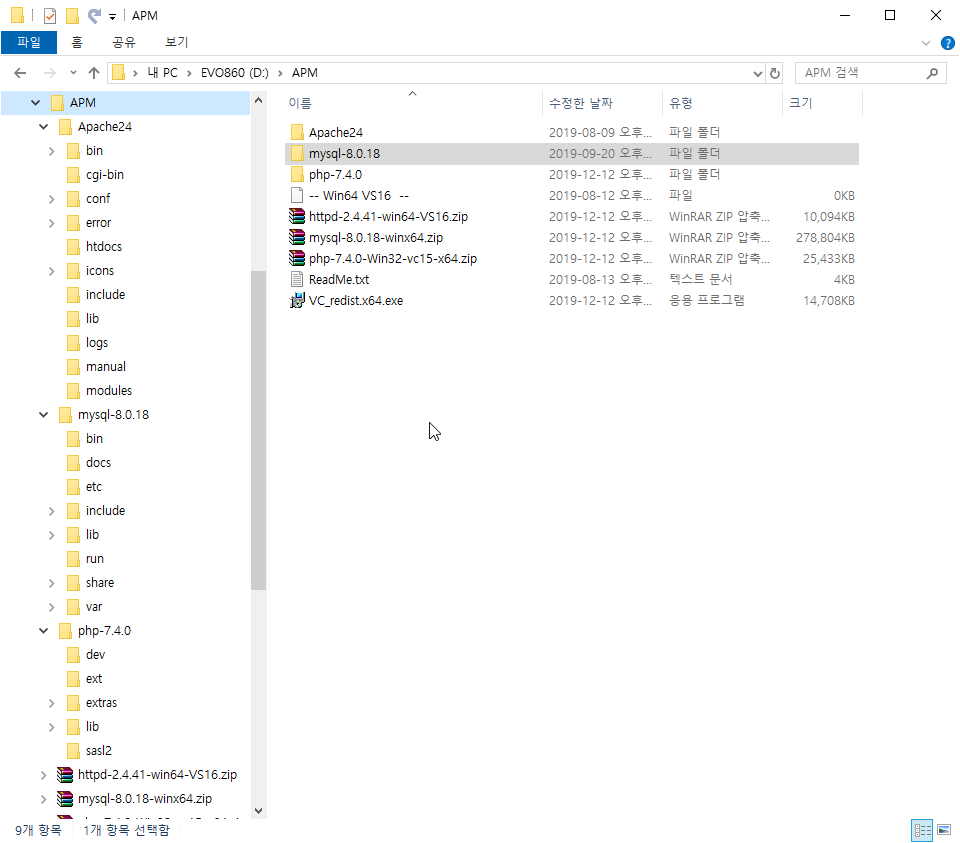
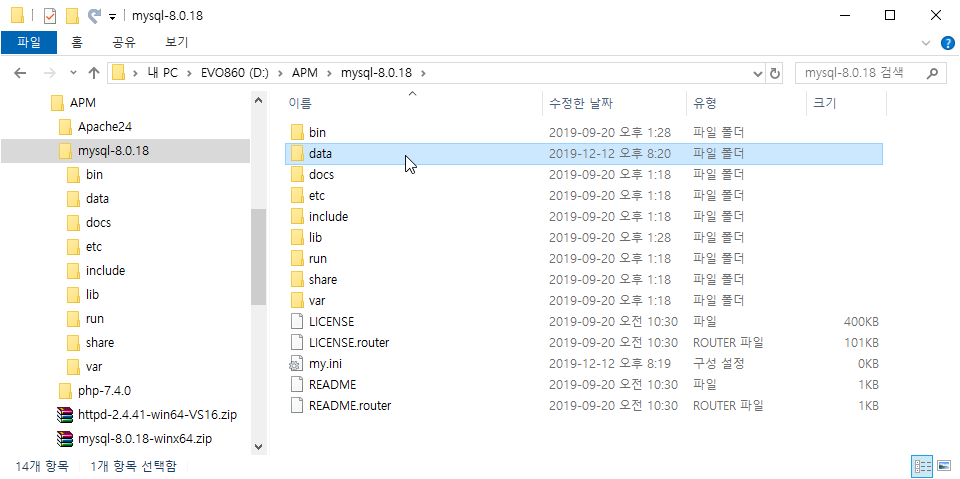
아파치, php, mysql 모두 포함된 디렉토리 구조입니다.
먼저 mysql 의 실행 파일들이 모여있는 bin 디렉토리를 시스템 환경변수에서 PATH 로 추가해 줍니다.
윈도우키 + R 해서 제어판으로 갑니다.
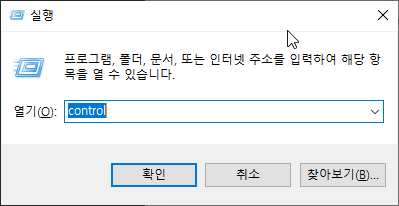
제어판에서 시스템 및 보안->시스템->고급시스템설정 으로 가면 됩니다. 아래 창에서 [환경 변수]를 클릭! 합니다.
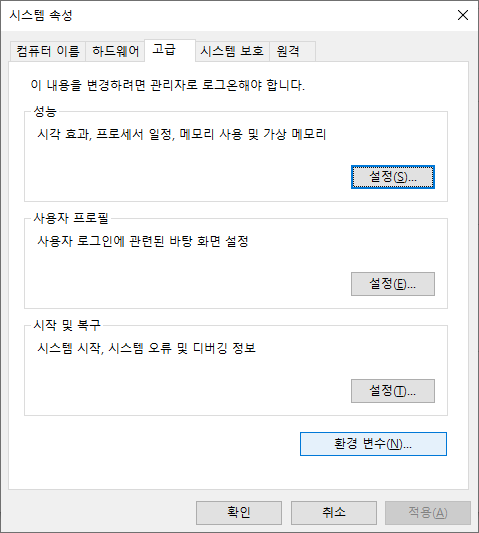
시스템 변수 중 Path 를 선택하고 [편집]을 클릭! 합니다.
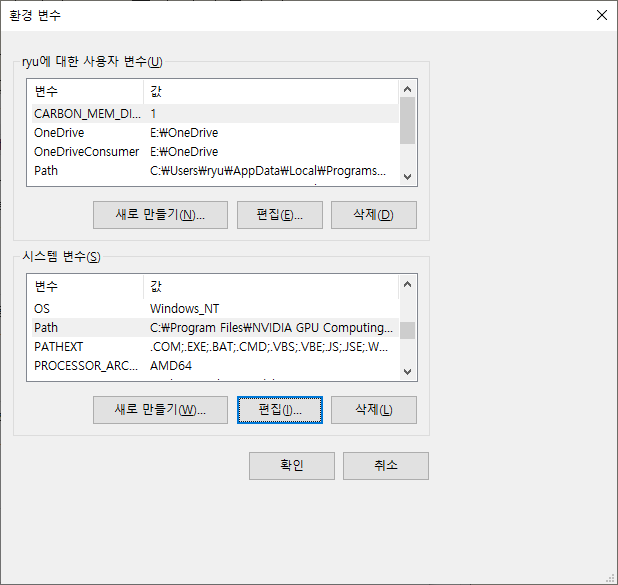
[새로 만들기]를 클릭하면 맨 아래에 빈칸이 만들어지는데, 거기에 mysql 의 bin 디렉토리 경로, D:\\APM\\mysql-8.0.18\\bin 을 입력합니다.
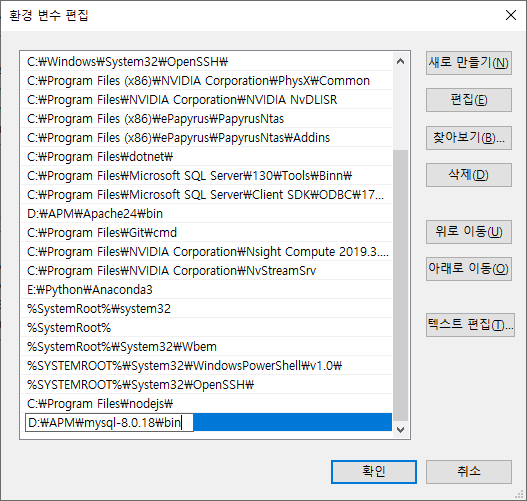
[확인] 클릭!
다음으로 mysql 의 설정파일을 만들어 줍니다.
D:\\APM\\mysql-8.0.18 디렉토리에 my.ini 파일을 만들고 아래 내용을 작성해줍니다.
[mysqld]
# set basedir to your installation path
basedir=D:\\APM\\mysql-8.0.18
# set datadir to the location of your data directory
datadir=D:\\APM\\mysql-8.0.18\\data
port=3306
datadir 에 보면 새로운 디렉토리가 필요한게 보입니다. 설정대로 mysql 디렉토리 아래에 data 라는 디렉토리를 하나 만들어줍니다.
관리자 권한으로 cmd 창을 열어서 D:\APM\mysql-8.0.18\bin 으로 이동합니다.
mysqld.exe –install 을 입력합니다.
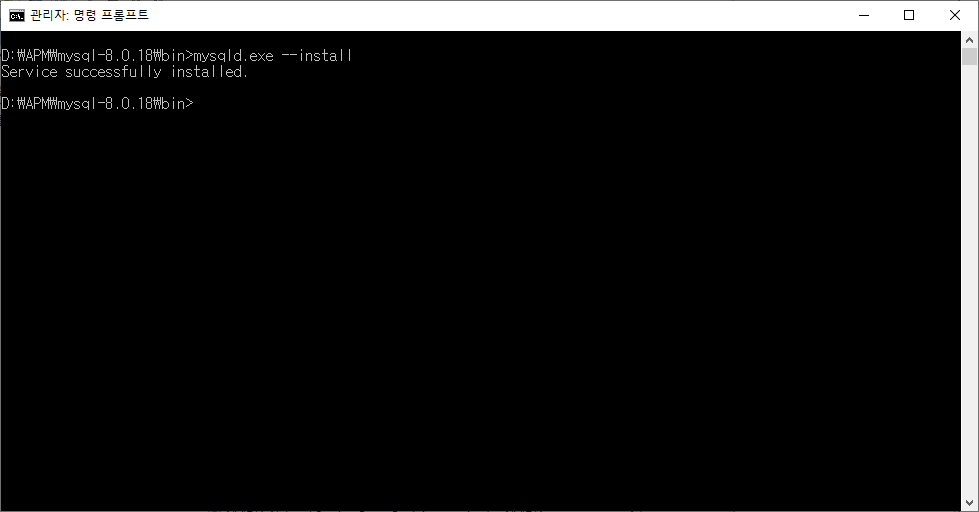
서비스로 등록이 되었습니다.
이번엔 mysqld.exe –initialize 를 입력합니다. initialize 앞에 ‘-‘ 가 두 개입니다. 1개로 하면 data 디렉토리 초기화에 실패합니다.

에러없이 실행이 끝났습니다. 하지만, data 디렉토리에 가면 확장자가 err 파일이 있습니다.
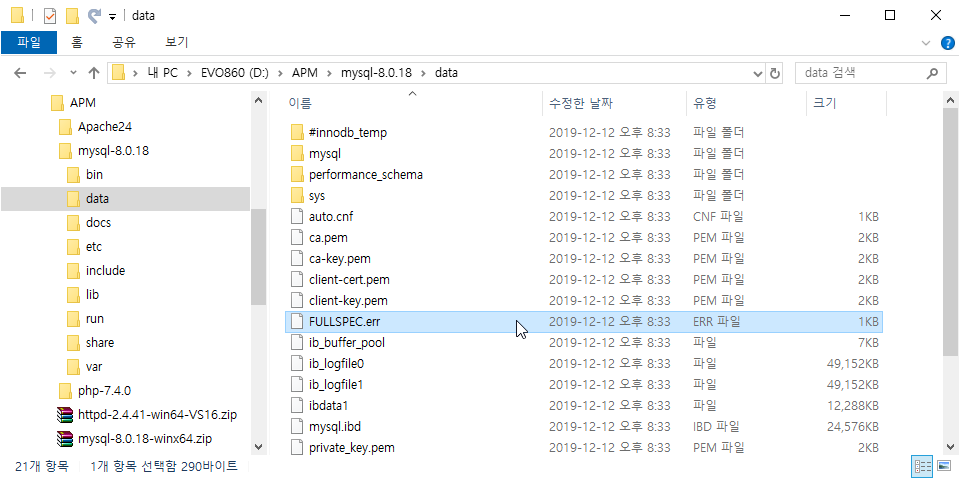
FULLSPEC 은 사용중인 컴퓨터의 이름입니다. 본인 컴퓨터 이름에 err 이 붙은 파일이 생겨나 있을 것입니다. 에디터로 열어서 살펴보면 중요한 정보가 들어있습니다.
A temporary password is generated for root@localhost: GyTrt1>7v0wH
mysql 의 root 계정의 임시 비밀번호가 있습니다. 잘 외워… 아니, 적어놓아야합니다.
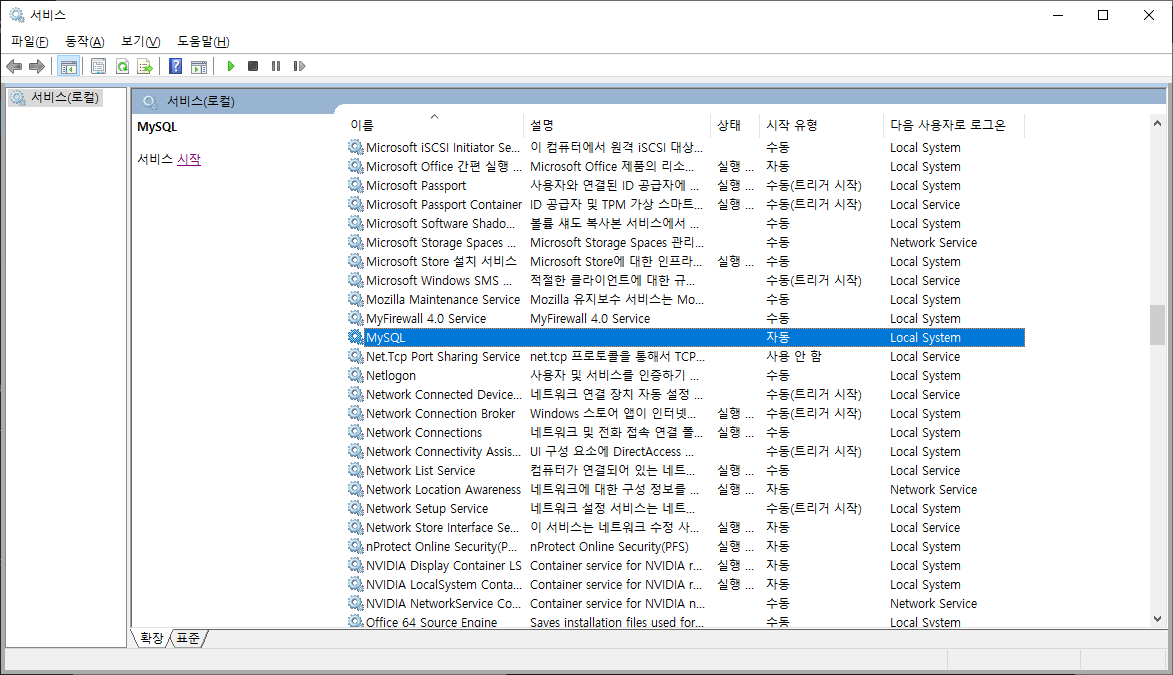
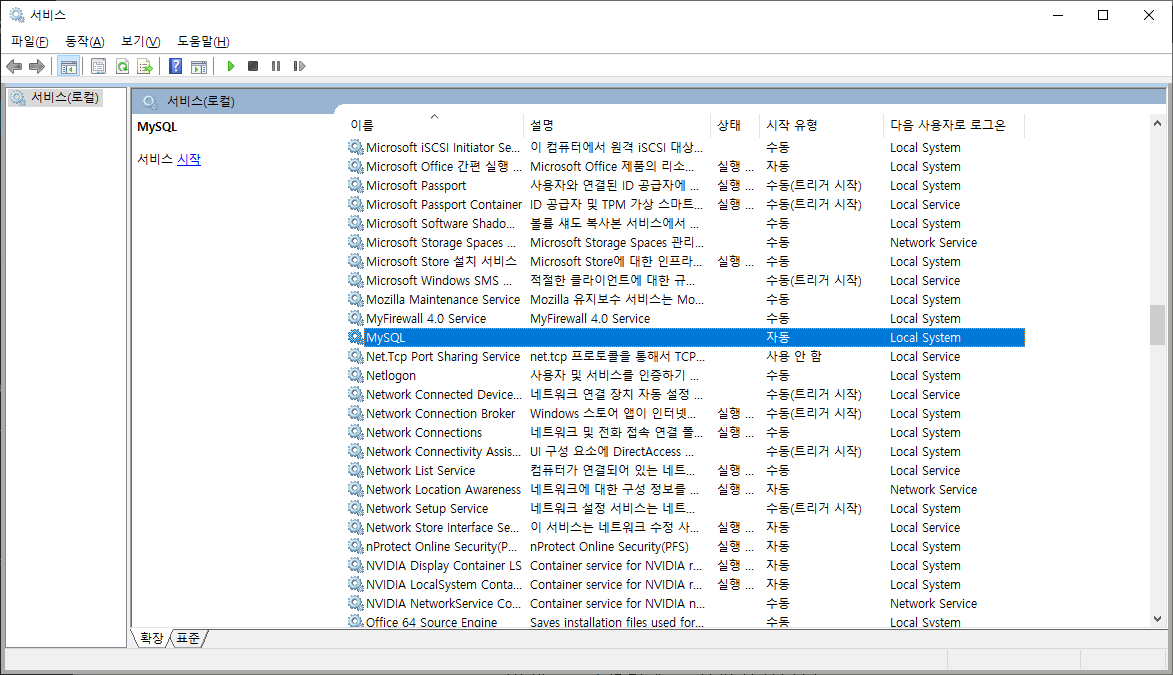
이제 mysql 서비스를 시작시킵니다.
root 비밀번호를 바꾸는 작업부터 해 줘야겠습니다.
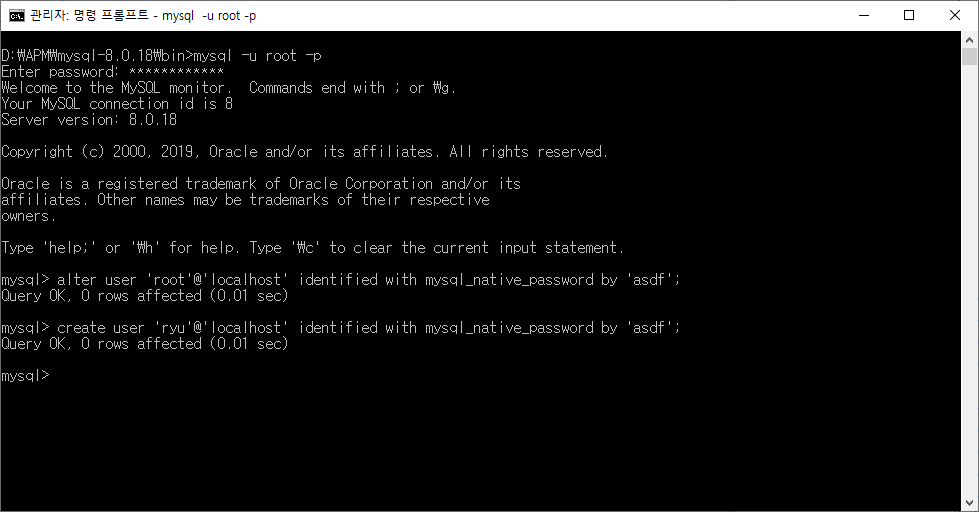
cmd 창에서 mysql 에 로그인을 합니다.
mysql -u root -p

비밀번호는 err 파일에서 찾은 임시 비밀번호를 이용합니다.
root 계정의 비밀번호를 asdf 로 변경합니다. 원하는대로 변경하면 됩니다.
alter user ‘root’@’localhost’ identified with mysql_native_password by ‘asdf’;

새로 계정 하나 만들어둡니다.
create user ‘ryu’@’localhost’ identified with mysql_native_password by ‘asdf’;
이제 php 가 mysql 을 이용할 수 있도록 설정을 해야합니다.
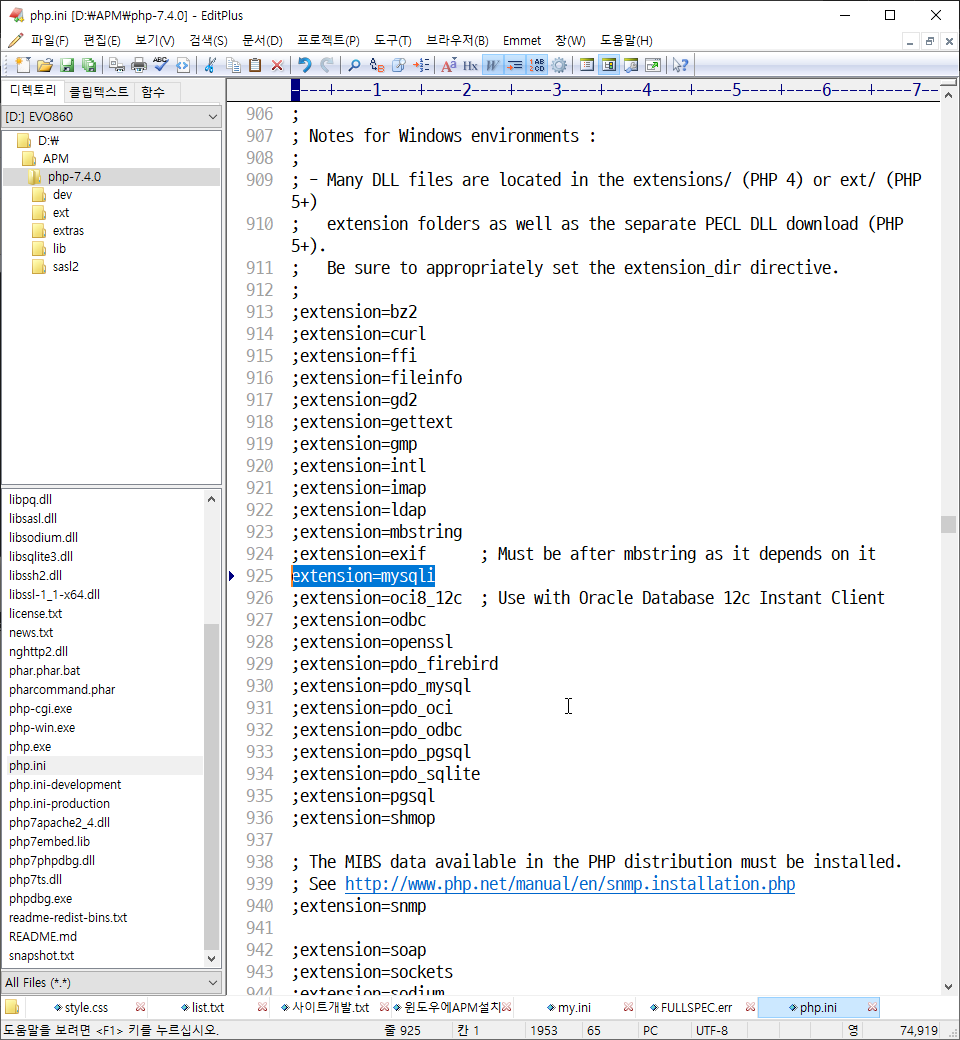
php.ini 를 수정합니다.
907번째 줄에 보면 윈도우즈 환경을 위한 노트가 있고, 그 아래에는 많은 extension 들이 보입니다. 이 extension 들 중에 사용할 extension 들은 세미콜론 주석을 제거하면 됩니다. 925번째 줄에 mysqli extension을 활성화시켜주었습니다.
이제 아파치를 재시작시켜주면, php 는 mysql 과 연동이 될 수가 있습니다.
이렇게해서~ 윈도우즈 10에 아파치, PHP, MySQL 을 모두 설치했습니다.
답글 남기기